Oolite-Box V1.0 Upgrade
Contents
1 Backup
2 Upgrade
3.Firmware
Preparatory work:
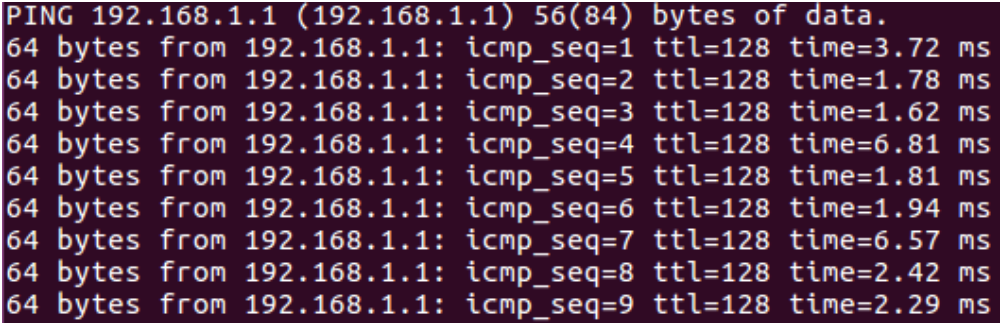
(1)connect lan: The Board IP generally 192.168.1.1,than sure PC ip and the Board IP in the same gateway, open cmd ping 192.168.1.1 -t sure wether connection
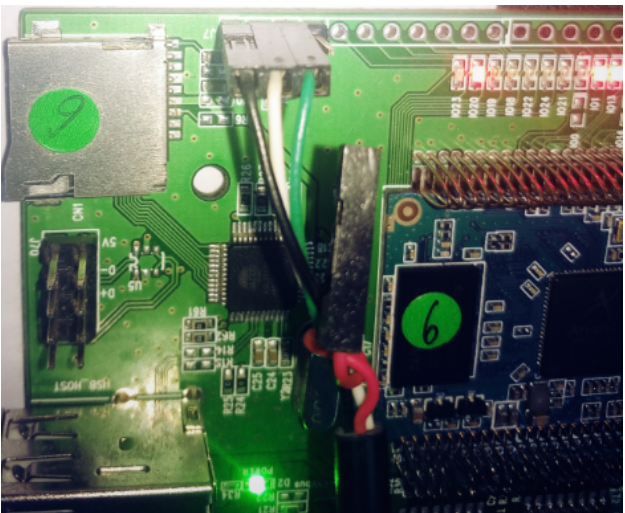
(2)(if the Board has the Serial)Serial Connection:the Red wire don’t connect,the Black wire connect ground,the Green wire connect TX,White wire connect RX
1.Backup
(1)Backup by net : 192.168.1.1
Turn on the Board and login net : 192.168.1.1, by chick and backup the current configuration files
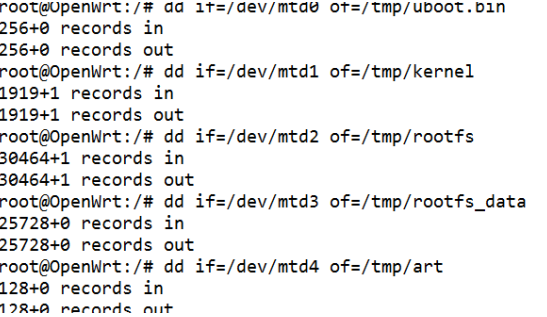
(2) Backup by mtd
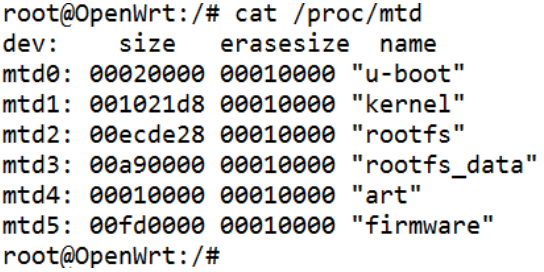
1. input cat /proc/mtd sure uboot,firmware zone
2. input dd if=/dev/mtd0 of=/tmp/uboot.bin (The same to the kernel ,rootfs,firmware,art)
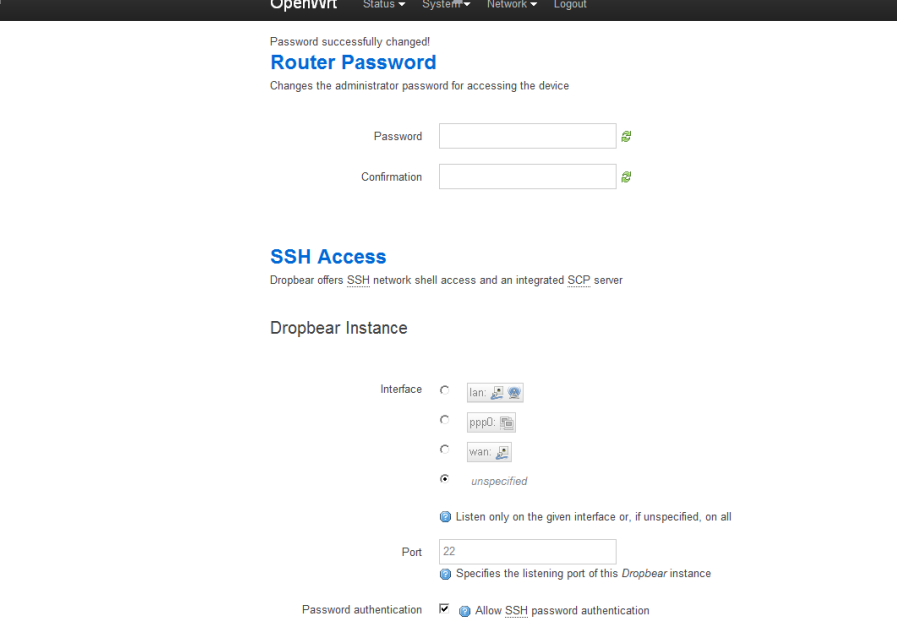
(3)login 192.168.1.1net and register password
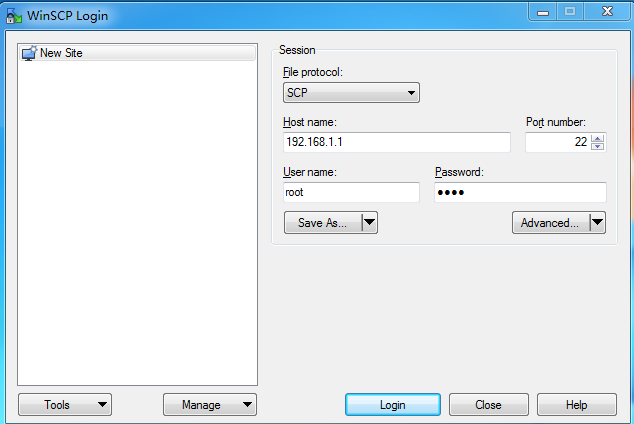
(4)Open winscp
Password:you register previously
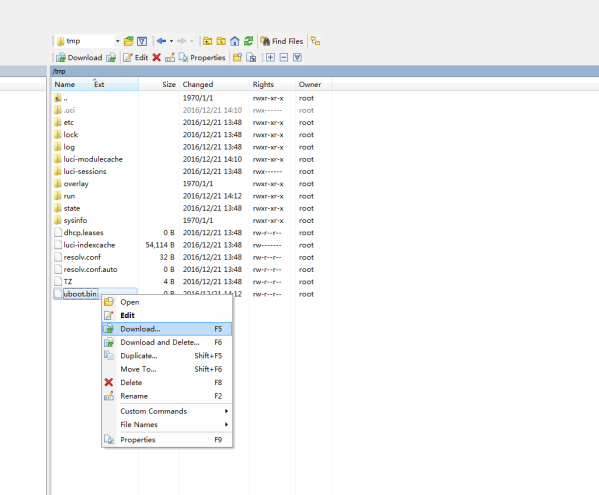
Download the file you previously you have backup
2.Upgrade
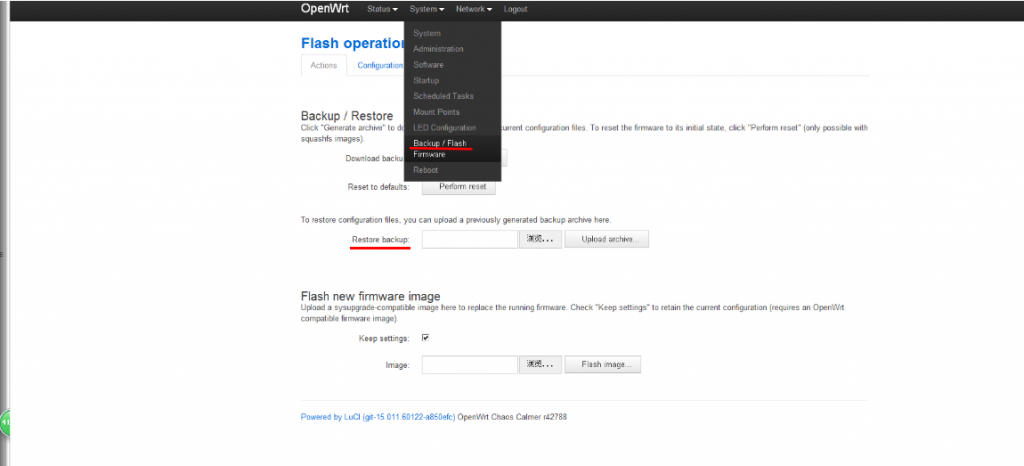
1.Upgrade by 192.168.1.1
turn on power at the board when enter the system login 192.168.1.1

at the red arow choice the image you want then Flash image
2.Upgrade by httpd
(1)Turn on the power again,when it count before zero press any key enter :UBOOT>
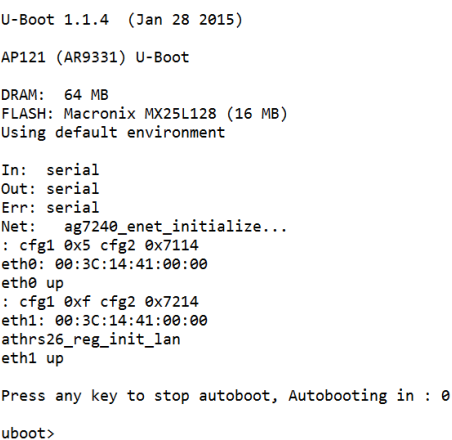
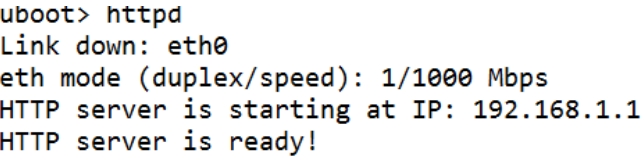
(2)input httpd
Tis:if your Board don’t have serial port you can turn on power again and long press reset key for 6 second ,then login 192.168.1.1
(3) login 192.168.1.1 net, choice Uboot and firmware you want

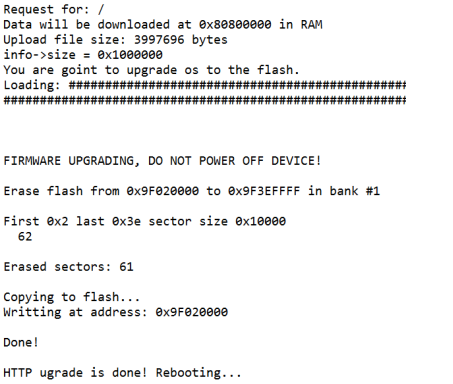
Chick UPLOAD

When you see console like that,it is done:
Upgrade by tftp
3.Upgrade by tftp
(1)put tftp and the file you want upload in the same Directory
![]()
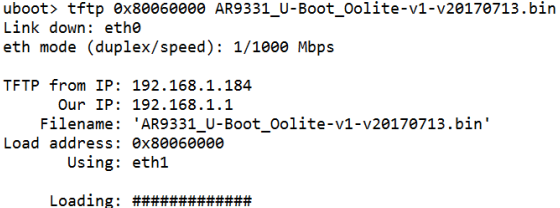
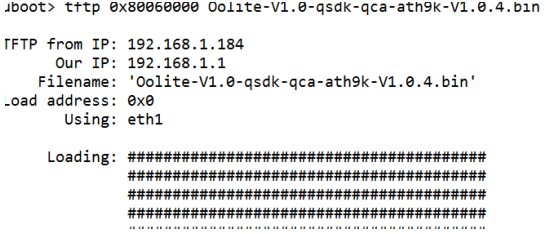
(2)Enter into Uboot> input setenv serverip “you pc IP”this ip with Board ip in the same gateway for example my PC ip 192.168.1.184
![]()
(3)tftp 0x80060000;ENTER
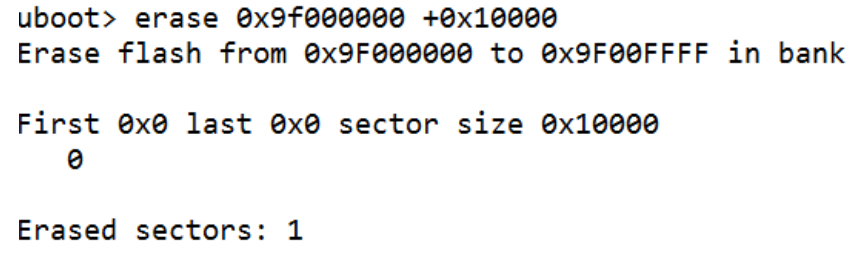
(4)erase 0x9f000000 +0x10000
(5)cp.b 0x80000000 0x9f000000 0x10000
(7)erase 0x9f020000 +0x3d0000

(8)cp.b 0x80060000 0x9f020000 0x3d0000
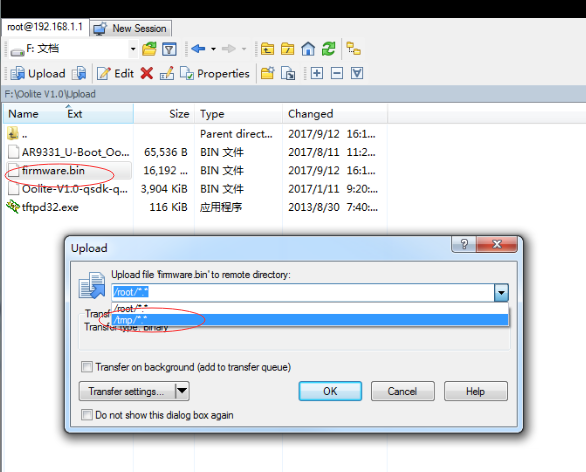
3.Upgrade by winscp + mtd
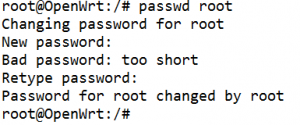
(1)Open the power supply,wating for system start to finish. Set “root” password
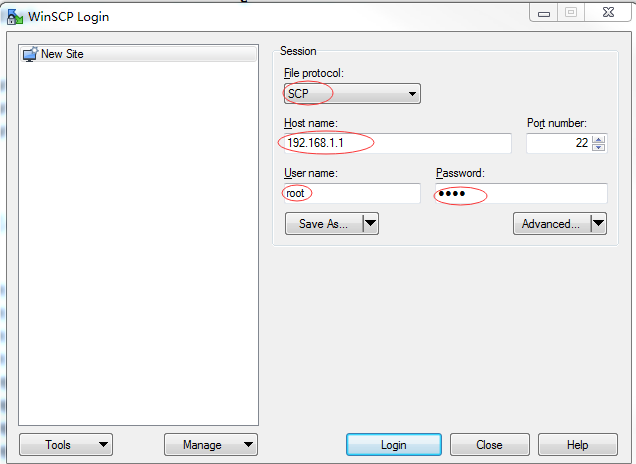
(2)Open the “winscp” software in windows 7
The left side is the windows 7 system files,and the right is Oolite V1.0 system files. The need to update the file, download to the right of the “tmp” directory
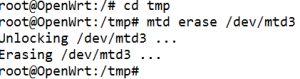
(4)In the SecureCRT console,enter the “tmp” directory
cd /tmp
mtd erase /dev/mtd3
(5)mtd write Oolite-V1.0-qsdk-qca-ath9k-V1.0.4-0x3d0000.bin /dev/mtd3

3.Firmware
Lede and QSDK firmware download link
Lede firmware download link:openwrt-ar71xx-generic-oolitebox-squashfs-factory
QSDK firmware download link:openwrt-ar71xx-generic-oolitebox-16M-squashfs-factory
Comments
So empty here ... leave a comment!