Oolite V8 Upgrade Instruction
1.preparatory work
Software:
Firmware – uboot.bin or openwrt.bin;
SecureCRT;
Tftp32;
WinSCP;
Hardware:
Known-good Ethernet cable;
Known-good serial cable;
2. Upgrade
2.1 Serial
Verify that DUT IP and server IP in same network segment
– For Oolite V8, verify that DUT IP 192.168.1.1 and set server IP 192.168.1.3;
Install serial port driver in PC;
Verify serial cable is available and serial com number through right click “Computer”- “Manage” – “device Manager” – “Ports”;


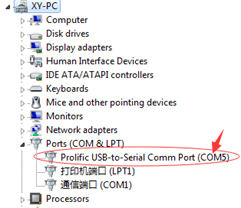
Open SecureCRT.exe with double click, click “File” -> ”Quick Connect” and set as below:
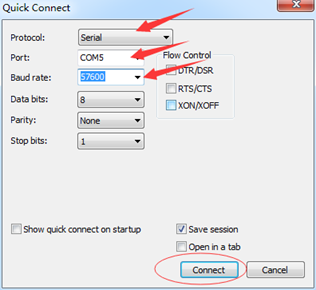
Port value may be different because of using different PC USB ports. Verify the right one for your PC.
Click “Connect” with verifying input correct port number and baud rate.
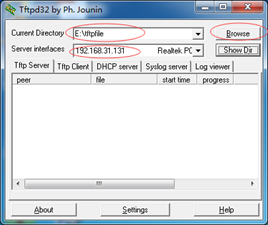
Open TFTP32 with double click and verify that the file for upgrade should be placed in same directory of TFTP32.
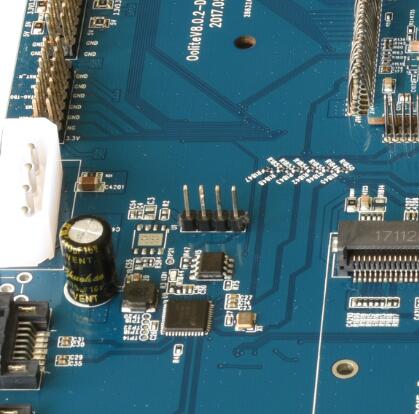
Connect corresponding serial port on board with PC via serial cable with the order as:
Black to GND; Green to RX; White to TX(From left to right, order should be 3.3V,RX,TX,GND).
Power on board after checking all cables available.
Choose operation listed:
Choose 9 to upgrade uboot:
Following steps informed, verify devices IP, server IP and uboot filename;
Choose 2 to upgrade firmware :
Following steps informed, verify devices IP, server IP and firmware filename;
Choose 4 to upgrade MAC address:
Input “help” – “mac_w”,following rules like:
mac_w mac_w<offs> <mac> eg.mac_w 0xbc040004 0C EF AF C3 00 00
2.2 Httpd
Connect LAN port of Oolite V8 with PC via an Ethernet cable;

Verify that DUT IP and server IP in same network segment
– For Oolite V8 httpd server, verify that DUT IP 192.168.1.1 and set server IP 192.168.1.3;
Hold reset button and power on.
Loose reset button after 5 seconds, DUT will inter httpd mode automatically;
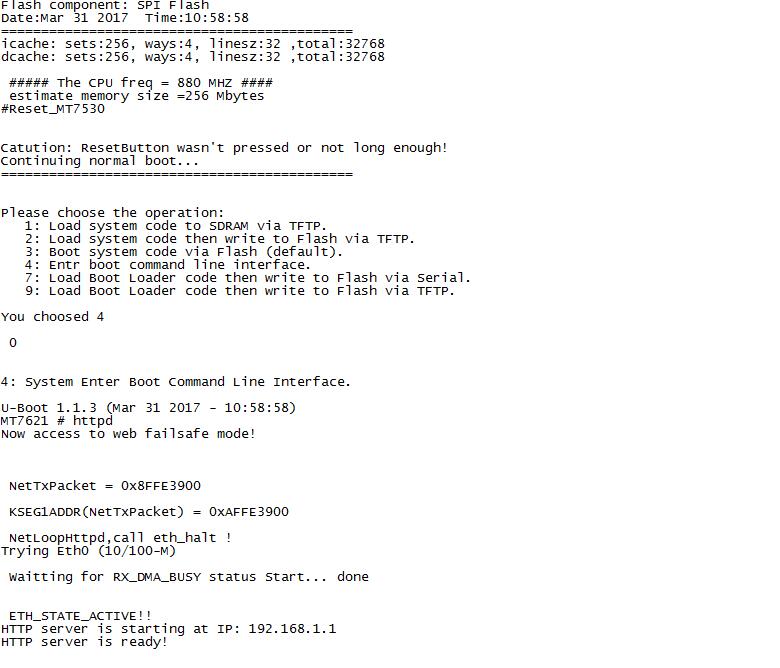
(or Select “4” -> “help” -> “httpd” on SecureCRT. Serial log would be like picutre below).
Enter “192.168.1.1” in browser(usually recommend with Firefox or Chrome);

Feel free to choose different parts of upgrade:
U-Boot for upgrading uboot,
CalData for flashing tuning value,
OS for upgrading openwrt;
Fireware for upgrading Backup data(choose carefully,it will ERASE WHOLE FLASH),
Backup for back up current firmware.
2.3 OpenWRT LuCI
Connect LAN port with PC via an Ethernet cable;
Verify that DUT IP and server IP in same network segment
– For Oolite V8, verify that DUT IP 192.168.1.1 and set server IP 192.168.1.1 (or input "ifconfig" in secureCRT to check the ip address of DUT if the ip address is not correct);
Power on and verify that LED lits;
Enter “192.168.1.1” in browser(usually recommended with Firefox or Chrome);
Click Login when a confirm window jumps out;
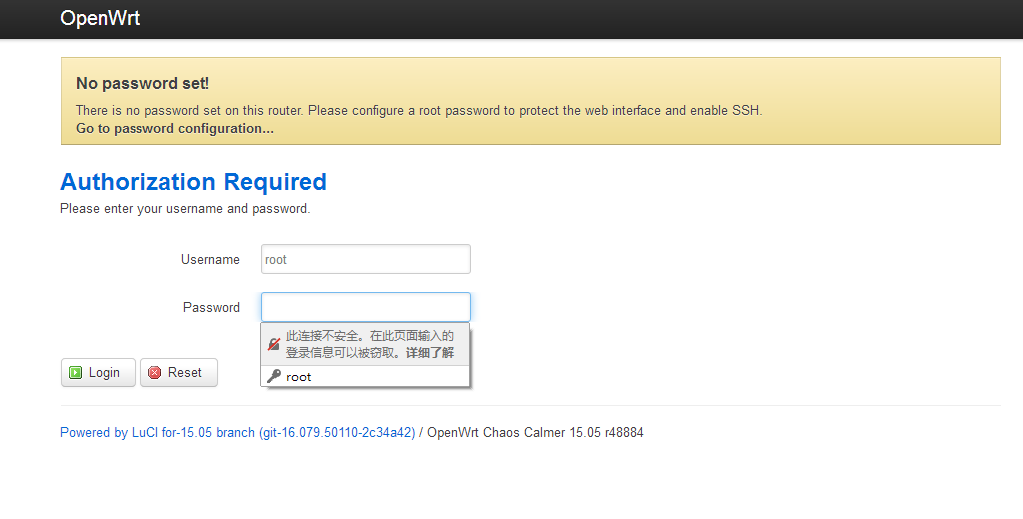
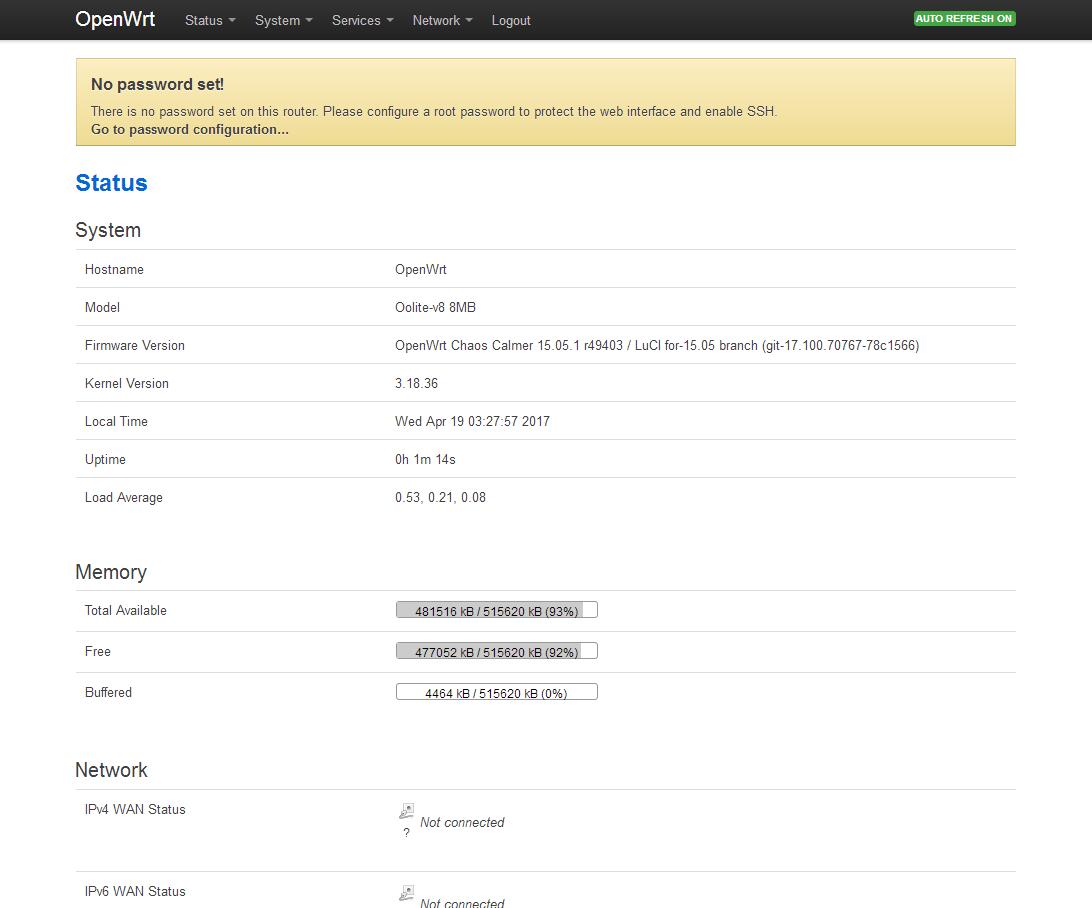
Click System -> Back Flashing/Firmware, entering Flash operations section;
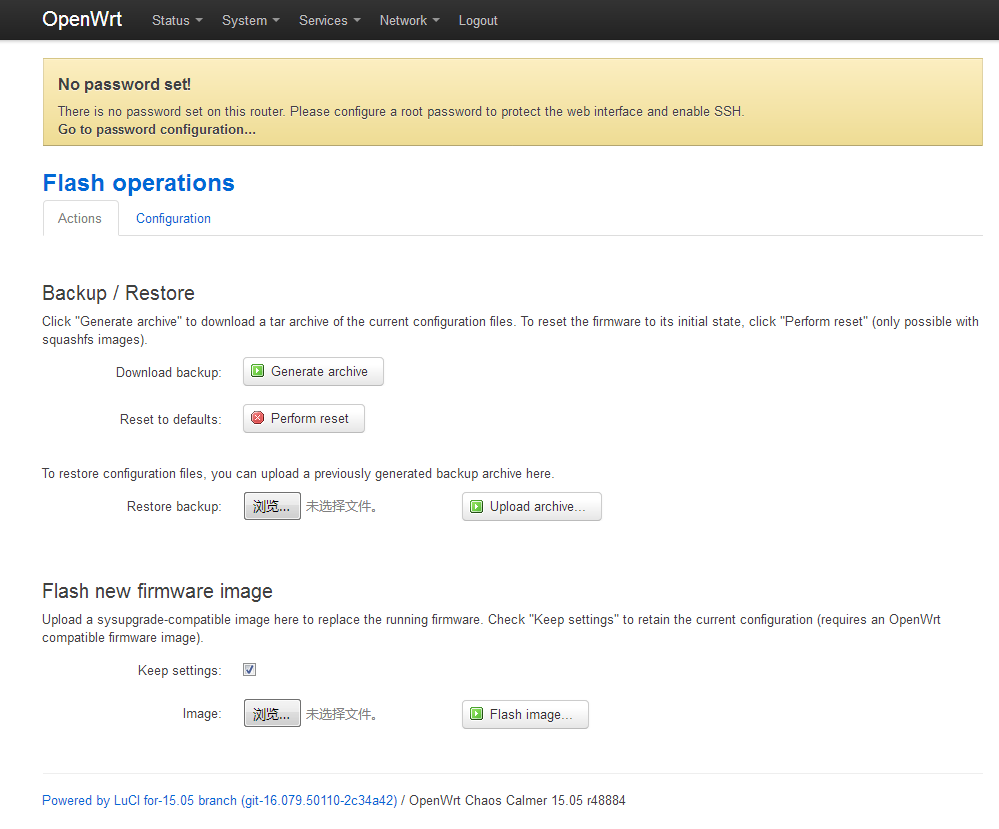
Choose an OpenWrt firmware image then click “Apply” to upgrade in Update Firmware section;
Choose a Bootloader image then click “Apply” to upgrade in Update Bootloader section;
2.4 Winscp + mtd update firmware
Open the power supply. Waiting for system starts operating.
Enter "192.168.1.1" in browser. Go to password configuration and verify user name with a new password.

Open the “winscp” software in windows 7.
Verify user name and password then click login.
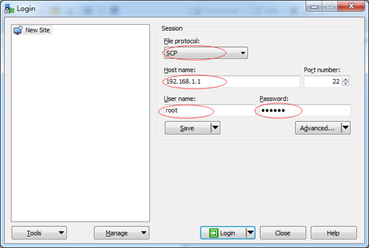
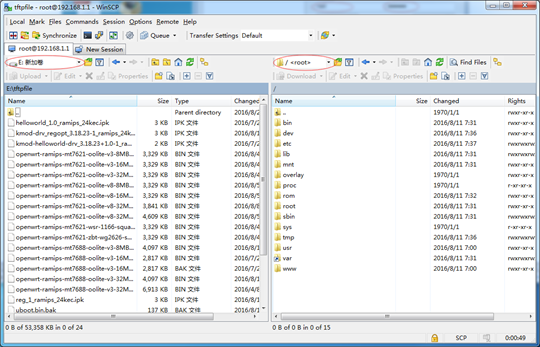
WinSCP shall form a connection of PC and openwrt so that users can transform data between each other.
The left side is the windows 7 system files,and the right is the system files of DUT.
Select correct files that you want to upgrade device. Right click the file and upload it to /tmp directory of DUT.
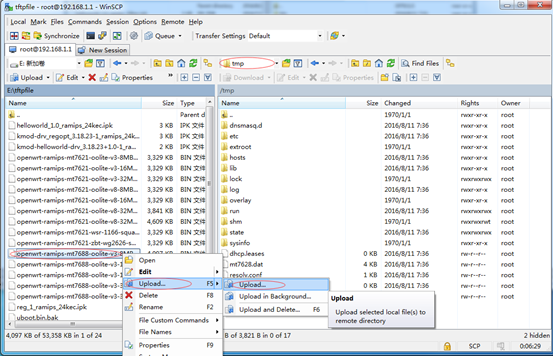
After uploading all files needed, enter /tmp directory on SecureCRT.
By input "cd /tmp correct" – "mtd erase /dev/mtd3" – " mtd write openwrt-ramips-mt7621-oolite-v8-8MB-15.05-v20170419-G8368.bin /dev/mtd3".
Firmware "openwrt-ramips-mt7621-oolite-v8-8MB-15.05-v20170419-G8368.bin" has been successfully upgraded.


Appendix
Firmwares for Oolite V8:
Uboot_MT7621_Oolite-V8_D3-512MB-800MHz-57600-v20170331
openwrt-ramips-mt7621-oolite-v8-8MB-15.05-v20170419-G8368
Comments
So empty here ... leave a comment!